This build is going to be an owners Journal/Review of the truck that slowly develops into a build. So, let’s get started.
Buying The Truck
![Image]()
Often times this isn’t covered in build threads but I feel it’s valuable to include. First off I’m a Toyota guy, my trail rig is a built 93 Land Cruiser, and my wife drives a 2015 4Runner. When I started truck shopping I wanted a Tacoma, but past experience had taught me to check out all options.
To start I was disappointed back when the “new” Tacoma came out, a worse engine, a transmission incapable of picking a gear, and the same truck Toyota had been producing since 2005(seriously wtf Toyota?.). Then came the Colorado test drive, the difference in ride, interior “niceness”(Toyota doesn’t offer leather or power seats) and Powertrain even had my wife who is not a car person liking the Colorado more. Combine that with the Diesel option and the choice was clear to me. In fact the differences are so big that I feel this is a good comparison for pointing out the degree to which magazines go to never slight a brand lest they lose ad revenue.
![Image]()
After picking a truck it was time to pick the package I wanted. I settled on a CCSB Duramax ZR2 with nav, and no other options. The local dealer had 4 trucks in stock or on order and one of them was the exact truck I wanted (none of the others had nav and they all had the ridiculously expensive dusk package.) I asked the salesman to give us a call when the truck I wanted came in. In the meantime I tried to find every reason possible not to buy the truck, I failed so I started shopping other dealers to get competitive pricing. I found some great deals including the one I got the local dealer to match, which was 7k under MSRP final purchase price for the truck was $41,000 and change, do not let a dealer talk you into MSRP!
First Impressions(First 1K Mi.)
![Image]()
One of the reasons we bought the truck was to tow our Kimberley Kamper. Unfortunately you’re not supposed to tow for 500 miles. The first weekend we had the truck we put 600 miles on the truck of very mixed driving everything from light off-road to highway and everything in between. I was very impressed with the Powertrain and fuel economy (25mpg calculated) this was of course using less than 1/2 throttle.
![Image]()
The following weekend we hooked up to the camper and headed for the mountains. Wow! Towing performance is excellent, the truck rarely shifted below 5th gear and the transmission did a great job not hunting, and with engine braking. The one shortcoming is passing to me it feels like the turbo is undersized, the bottom end is epic, but power falls off quickly around 3K despite not shifting until 4K. Towing the trailer we got 19 mpg (indicated) with great performance, very happy with the truck overall.
So far I am very happy with the truck and have no plans to run back to Toyota.
Hits(Better than Toyota)
Near Miss
Miss
Future Plans
The goal for the truck is for it to be very versatile, as I make changes they will be documented here and other builds used for inspiration will be cited
Mods
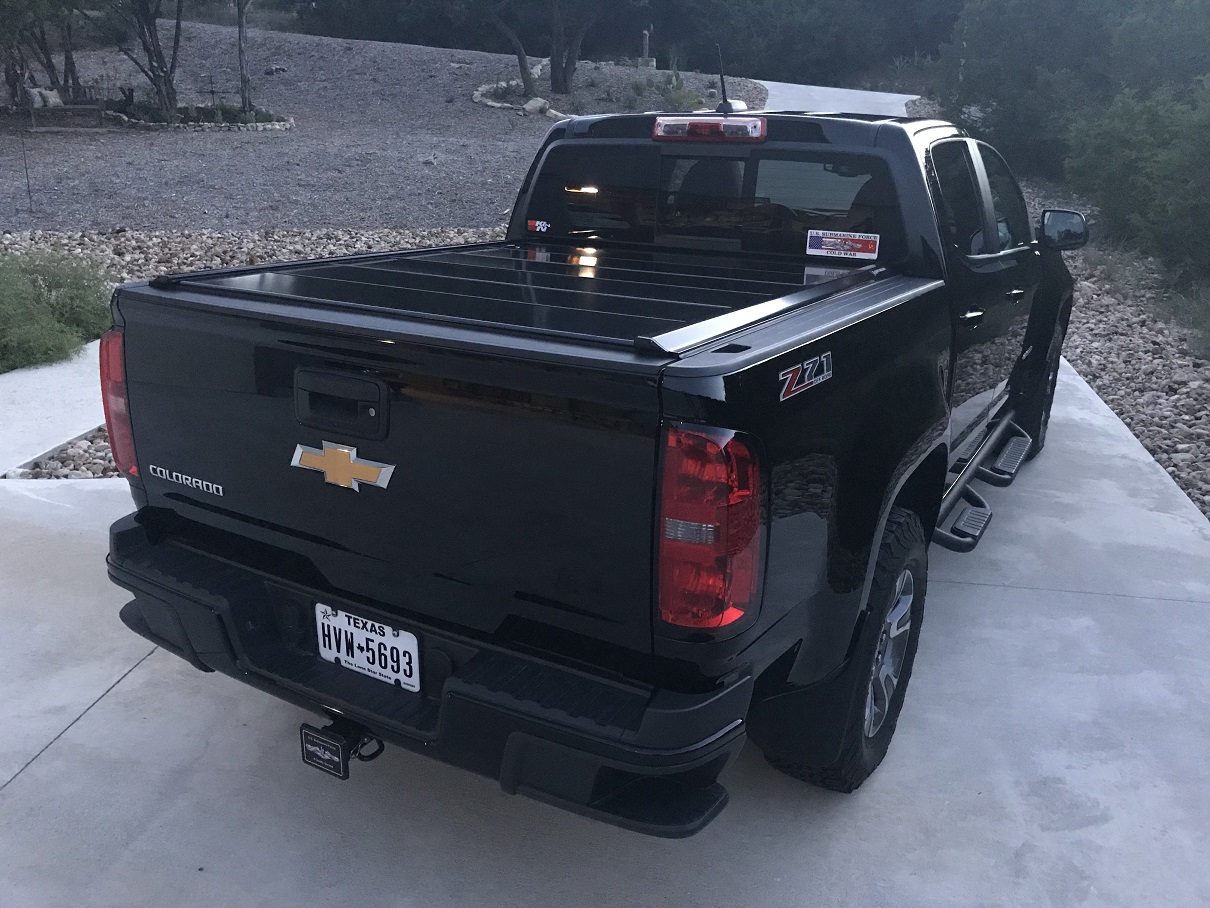
[*]Peragon Tonneau Cover
Current Pic
![Image]()
Buying The Truck
Often times this isn’t covered in build threads but I feel it’s valuable to include. First off I’m a Toyota guy, my trail rig is a built 93 Land Cruiser, and my wife drives a 2015 4Runner. When I started truck shopping I wanted a Tacoma, but past experience had taught me to check out all options.
To start I was disappointed back when the “new” Tacoma came out, a worse engine, a transmission incapable of picking a gear, and the same truck Toyota had been producing since 2005(seriously wtf Toyota?.). Then came the Colorado test drive, the difference in ride, interior “niceness”(Toyota doesn’t offer leather or power seats) and Powertrain even had my wife who is not a car person liking the Colorado more. Combine that with the Diesel option and the choice was clear to me. In fact the differences are so big that I feel this is a good comparison for pointing out the degree to which magazines go to never slight a brand lest they lose ad revenue.
After picking a truck it was time to pick the package I wanted. I settled on a CCSB Duramax ZR2 with nav, and no other options. The local dealer had 4 trucks in stock or on order and one of them was the exact truck I wanted (none of the others had nav and they all had the ridiculously expensive dusk package.) I asked the salesman to give us a call when the truck I wanted came in. In the meantime I tried to find every reason possible not to buy the truck, I failed so I started shopping other dealers to get competitive pricing. I found some great deals including the one I got the local dealer to match, which was 7k under MSRP final purchase price for the truck was $41,000 and change, do not let a dealer talk you into MSRP!
First Impressions(First 1K Mi.)
One of the reasons we bought the truck was to tow our Kimberley Kamper. Unfortunately you’re not supposed to tow for 500 miles. The first weekend we had the truck we put 600 miles on the truck of very mixed driving everything from light off-road to highway and everything in between. I was very impressed with the Powertrain and fuel economy (25mpg calculated) this was of course using less than 1/2 throttle.
The following weekend we hooked up to the camper and headed for the mountains. Wow! Towing performance is excellent, the truck rarely shifted below 5th gear and the transmission did a great job not hunting, and with engine braking. The one shortcoming is passing to me it feels like the turbo is undersized, the bottom end is epic, but power falls off quickly around 3K despite not shifting until 4K. Towing the trailer we got 19 mpg (indicated) with great performance, very happy with the truck overall.
So far I am very happy with the truck and have no plans to run back to Toyota.
Hits(Better than Toyota)
- Interior
- Powertrain
- Cabin Noise
- Bed Depth
- Stance
- Styling
Near Miss
- Wireless Charging Pad(does it fit anything?)
- Suspension Tuning
- Power Deliver(Diesel)
- Infotainment (better than Toyota but no where near Ford)
Miss
- No factory inverter!?!?
- Spare Tire Mounting(low)
- Shock Mounting
- Fit and Finish
Future Plans
The goal for the truck is for it to be very versatile, as I make changes they will be documented here and other builds used for inspiration will be cited
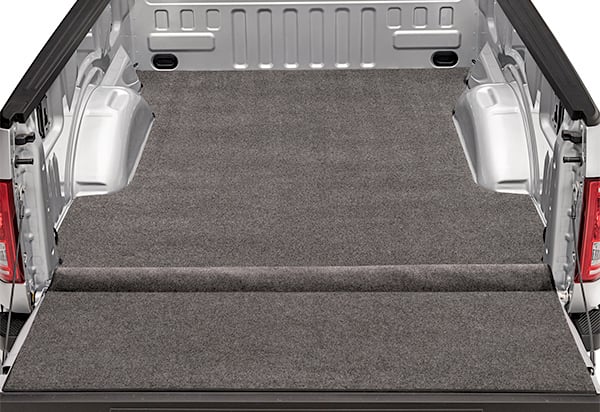
- Bed cargo control (lost)
- Over Tonneau Bike Rack
- Headache rack and 2nd sliding rack (custom)
- Lift Spacers(front)
- Custom Deaver Rear Springs, remove factory spacer and longer shackles, new lower shock mounts to raise shock up to keep in same portion of travel after lift and offer better ground clearance
- Trail Boss headlight switch wired into factory bcm
- Bed lighting
- Mud flaps
- Black illuminated bow tie (maybe)
- 255/80R17 KM3 on stock wheels
- CBI front bumper and rc9 winch
Mods
[*]Peragon Tonneau Cover
Current Pic


")