Chevy Colorado & GMC Canyon banner

Dual Batteries

3 reading
132K views 283 replies 72 participants last post by  kperras  
#1 ·
Has anyone mounted dual batteries in the engine bay yet? Have a fridge on the way and am debating on going stand-alone house battery (on solar) or going 2x under the hood. I'm leaning heavily towards house battery and solar but have yet to make a decision.

I don't recall seeing any set-ups like this but I could have missed it.
 
#10 ·
A few weeks ago I passed a newer truck with a cap that had the top of the cap lined with solar cells. It looked very professional in how it was put together and based on your note, I'm thinking the person had something running directly from solar or was charging batteries to run something in the box. Thinking about it, they very similar to the ones that I had on my motorhome that were basically a stick on model.
 
#3 ·
Thanks for the reminder. I remember your set up from way back when on the Diamondback but had forgotten.

So, I'll post my current plan and thoughts:
  • Although I'll have to check to see if a high clearance rear bumper would work with this, my original thought was to stash the house battery in the area previously occupied by the stock spare. I can't imagine this interfering, but my first priority is to fix the terrible departure angle on my truck. A second battery location won't get in my way!
  • The fridge will most likely occupy some of the rear seat space (otherwise I'll probably have to protect it from the weather, and thieving eyes, in the bed). I am thinking about removing the passenger side rear seat if I can pull out just one side, honestly I haven't looked that closely.
  • Solar battery maintenance is what I'm gravitating towards, and a panel would be added by one of these options: mounted on my current bed rack or mounted on a to be purchased roof rack from M-Racks. Honestly I don't think I have enough vertical space on the rack to side mount a panel. If I went this route, it would be on a hinge system to allow me to optimize the angle of the panel (or remove it for ground placement) when parked. If I add a roof rack it would just stay up there.
  • If the battery is small enough, battery mounting on the passenger side of the engine bay is viable. This would negate the need for solar as I could easily tie into the alternator. I suppose I could do that if bed-mounted but if the battery is in the back I'd just assume make it stand alone. Most of my trips are point to point so maintaining charge via the alternator isn't a huge concern. However, I do like the idea of keeping a second "camp" system completely off of the vehicle electronics.
  • A second battery added to the vehicle charge system would provide nice redundancy/capacity once a winch is added. Probably completely unnecessary, however.

Anyway, just weighing options. A stand-alone solar system seems easier but would probably end up being more expensive.

In other news, we may have some new product lines for you guys to check out. Just sayin'!
 
#5 ·
I've read you can turn the OEM battery 90* and then add another Group 48 battery right next to it. I have been doing some research on it. Being in the PNW solar is hit or miss, maybe something I can add if I have sun light.
 
  • Like
Reactions: WA_Colorado_Guy
#9 ·
OK, I've been thinking about this a lot and I think the best thing for me is going to be under the bed. Without the spare in the way the packaging is too easy.

Now I just need to figure out how I want to address power distribution/charge controller. I suppose I'll have to put a box somewhere in the bed for this.
 
#12 ·
#11 ·
You could put an Inverter into one of those side pockets next to the drawers and a few weather proof sockets so you can get some 120V plugs in the bed.

only if you're comfortable drilling new holes into your brand new drawer system.

Something similar to this
Image
 
#13 ·
I mounted a decent size AGM infront of the air box with a battery isolator. It's a tight fit but works good. Been running it with no alternator charging issues.

My plans this winter is to look into relocating both batteries under the rear of the box somewhere.

http://coloradofans.com/forums/showthread.php?t=329626


Sent from my SM-G935W8 using Tapatalk
 
  • Like
Reactions: RazorHawk
#15 ·
Oooooooo, might see what you come up with.

No Optima for me though, we've had a string of bad luck with those.
 
  • Like
Reactions: 16WhiteColly
#17 ·
For the diesel-owning truck campers among us, I don't see much choice other than what lqdchkn@ said about underneath the coolant reservoir. Looks like plenty of room, although I haven't checked out the dimensions of some deep cycle batteries. It also seems like there might be some room to run thick gauge wire behind the top of the engine cover over to the factory battery for an isolated dual setup. Might be wishful thinking.

Still got a lot to learn with all of it. Been looking at the $50 DIY option from Expedition Portal as a guide: How to make a cheap isolated dual-battery setup for $50 - Expedition Portal Looking forward to seein what y'all come up with.
 
#19 ·
I scoped that out - there's two things I'd be concerned about. One is that connection running to/from the engine that would be blocked by the batteries, forcing a mechanic to remove the homegrown setup in order to disconnect if they had to. The other is that it looks like you'd have to drill in to the chassis to mount a tray - not sure if I'm seeing that right, but it's some sort of steel tubing that looks structurally important. I would prefer not to poke holes in it. Maybe I'm overestimating it's importance.

Still liking the idea of installing underneath the coolant reservoir - mount to the truck body and out of the way for any mechanics. Anyway - one thing at a time. This is probably in the top 20 of projects I'd like to do and maybe top 10 of the projects I actually have time for.
 
#20 ·
I scoped that out - there's two things I'd be concerned about. One is that connection running to/from the engine that would be blocked by the batteries, forcing a mechanic to remove the homegrown setup in order to disconnect if they had to. The other is that it looks like you'd have to drill in to the chassis to mount a tray - not sure if I'm seeing that right, but it's some sort of steel tubing that looks structurally important. I would prefer not to poke holes in it. Maybe I'm overestimating it's importance.
Your talking about the large wiring harness connection? Mine is still accessible, it's located lower than the battery and on the frame. I did have to relocate my horns though. As for the tray mount, I utilized the two mounting spots for the air box for the rear of the tray. The plastic ridges had to be trimmed. The front of the tray is sitting on a rubber pad. The upper piece that clamps the battery in place (and has the isolator) hooks into a round hole in the steel under the tray and holds everything down.

No extra holes were drilled and nothing welded directly on the truck for me.

Sent from my SM-G935W8 using Tapatalk
 
  • Like
Reactions: thewams and lqdchkn
#24 ·
Has anyone put an ACR (automatic charging relay) or similar on their truck? I have a custom off-road trailer with three solar cells and two deep cycle marine batteries. It's nice to have the option of topping up trailer batteries while towing or charge if not getting enough solar. I had and ACR unit installed on a previous tow vehicle, but don't know about messing with the electronics on my ZR2. I talked with one guy who said I may want to install a dual battery system to the truck with an isolator between to the two batteries before going to the trailer from the second battery.
 
#25 ·
For charging and maintaining batteries I like Redarc products. I put a BCDC 1225 on my trailer for charging my deep cycle battery. It has an automatic low voltage cut off to prevent draining the tow vehicle battery and is a smart charger. They have lots of products and solutions so they are definitely worth a look.

-Curtiss
 
#27 ·
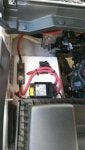
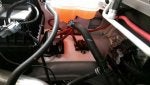
I have looked into several ways to wire up a second battery and kind of hit brick walls everywhere I turned...too expensive, too complex, etc. What I really wanted was a way to isolate my camper shell from the truck battery so that I wouldn't drain the truck battery but still be able to charge it via 12v DC or 120 AC. I was looking at $200-$300 for any solution that I could find.

Then I saw one of these at REI one day. Goal Zero Yeti 400 Portable Power Station | Power Packs | Goal Zero While pretty expensive, it was exactly what I was looking for. Kept researching them and while kind of neat, solar doesn't really buy me a whole lot. The panels really need over 24 hours to charge the battery which means you would not be able to keep up only on solar but you could stretch an extra day or two out of it with a solar panel. But it would do everything I wanted and would really last as long as I wanted plus it was self contained and could easily be removed.

Then I checked Amazon and found this: [ame]https://www.amazon.com/Portable-Station-Generator-Flashlights-Emergency/dp/B076PR4TBZ/ref=sr_1_13?ie=UTF8&qid=1517344089&sr=8-13&keywords=suaoki[/ame]

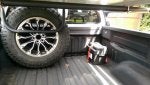
It was on flash sale at Amazon for $99 so I grabbed it. Pretty sure it will do all I will need (phone and camera battery charging, few LED lights, airbed pump.). If it doesn't meet my needs for AmpHours, Suaoki does make a 220W and a 440W unit that I could upgrade to later or you could run a fridge off of.


I know this doesn't solve big issues like power draw for winches, compressors, etc. where a second battery or bigger alternator do help but for 99% of what I want to do with a second battery this guy serves my needs
 
#30 ·
Where can I learn more about this? I'm still thinking my house battery will stay 100% separate but I'm curious....
 
  • Like
Reactions: jolagues
#33 ·
Same here in my diesel. I mounted the ACR, thermal breaker, and 150w fuse on a piece of cutting board, and mounted it to the fender under the coolant reservoir. Ran the positive from the bed, up the frame to the breaker. Ran another wire across rear of motor to the starter battery (which is rated at 95ah, btw). Ran the negative back to the rear frame grounds. Will post pics soon.
 
#34 ·
I already have a solar controller back there so that I can run panels while Im stationary to keep the batt topped up. I suppose Im using that and a toggle switch pretty much like you guys are using the ACR...just a bit more manual on the one hand.
 
#35 · (Edited)
Chris, have you made any progress? NorCal any pics?

Im working on some similar ideas, currently working out all the kinks and trying to setup a dual battery on my truck. I have a blue seas ML-ACR, and am planning on putting the house battery in the bed, since there doesn't seem to be enough space under the hood. I might be getting caught up in the details, but I wanted to see where you all would tap into, for the run from the start battery to the ACR. The factory positive terminal really isnt ideal. Going off the fuse block(mounted on top of the battery) doesn't seem like the best idea either. So then Im wondering if maybe I should get a new terminal, maybe a mil spec. Something I can just use lugs, 1 for the positive to fuse block, 1 for the positive to ACR.
 
#40 ·
Chris, have you made any progress? NorCal any pics?
I haven't had a whole lot of time for this project. I had to cancel one of my bigger trips for the summer so the need is less, plus I'm swapping out my suspension at the moment to get the Icons rebuilt so I haven't had a ton of time for this (sadly). On the plus side the DEF tank will be coming out when I do the suspension so I'll have plenty of room for shenanigans underneath :nerd:

One day!
 
  • Like
Reactions: Savingpvtpyle
#36 ·
I have a fridge in my Jeep. An ARB 50 quart. It runs on either 120v or 12v. I have a dual battery setup using the Painless kit. It's basically a big solenoid controlled by a toggle switch.

For the fridge circuit I simply used a SPDT relay and wired it 'backwards'. Post 30 goes to the fridge. Post 87a (NC) goes to the aux battery (yellow optima) and post 87 (NC) goes to the regular battery/charging circuit. With the ignition off, the power comes from the second battery to post 87A and then out post 30. With the ignition on the relay is triggered and power comes from the normal circuit to post 87 and then out post 30.

The two systems operate independently of each other. It's simple but effective.
 
#38 · (Edited)
I just bought an ArkPak and a 105Ah deep cell AGM battery today. My truck is multipurpose and I want lots of flexibility so I'm sticking with my modular plan; things-in-a-box that can be removed and placed safely at home when I'm not using them; also less weight. Anyhow, I'm playing with the ArkPak right now; running my PC from it to see how it discharges. It will be mounted to a board that will in turn be mounted to the truck bed for easy removal; my new fridge will be mounted to the same board. I'm going to get a battery isolator and run thick gauge power lines from the main battery to the ArkPak's big black and red terminals then run the fridge and other goodies from the ArkPak.

I'll report back when I've got more experience using the ArkPak.

NorCal ZR2: where are the rear frame grounds located? (I admit I haven't looked yet)
 
#41 ·
I have installed a second battery in the bed of my truck and am using the National Luna dual battery management system with a smart solenoid to send power to the auxiliary battery after about 5 minutes of charging just the main battery. However, the 2nd battery, and Odyssey AGM 205AH, does not fully recharge. Watching the volt meter on the display at some point when the Electric Power Management (EPM) system in the ZR2 sense the main battery is fully charged it drops the voltage from 13.7 or so down to 12.5 which is not enough to fully charge the AGM deep cycle battery. Odyssey tells me I need 14.7V. At 12.5V neither of the batteries is being charged.

Thoughts?
 
#43 ·
I stole this content from a post I made on ExoPortal so it may seem a bit out of context.

So I wanted to follow up on this. I did this but with a DPDT switch between the truck and the solar panels so I could manually switch between the 2 sources going into the charge controller. And it works. Not sure why everyone (I posed this question in other places too) kept saying not to try this without really any supported reasoning why but I did it anyway (the main risk was a $30 charge controller and that was acceptable to me).


My OEM trailer wiring will apparently support up to 30A at least that's what the factory fuse is rated to. I have a 20A solar controller...important thing to note here is that, at least in my case, the Amp rating on the charge controller is BOTH the max charge current and max output current capability so make sure you have headroom. I bought mine based on the max output and was unaware of what the max charging could be. So I was very surprised to see that my "house" battery when charging off the truck will charge at a rate up to 20A (though it typically only maintains about 17A continuous). This frightened me at first because most battery chargers have like a 6A and 2A charge setting and this seems really high in comparison but given that batteries can purportedly handle charge current at about 20%-25% of their rated AH rating and this is a 95AH battery I should be good. Additionally this rate is not always constant, the charge controller does do it's thing and as the battery charges has been dropping Amps and is now typically charging at roughly 10A after a few 1hr commutes home from work.


An interesting note in my case is that the charge controller also seems to have some logic built in (based on resistance maybe???) and it seems will only pull a "safe" amount of amperage to charge based on the wire gauge used??? As an example when I hooked everything up to test I had really small gauge wire, like 20awg as I just wanted to see what would happen. I noticed that the controller was charging the battery at a max of about 8A. Max I saw on solar charging was like 5A so that seemed about right. So I ran the connections with 16awg wire so it would be plenty capable. But with the 16awg wire the controller will typically charge at a constant 17A when the battery is low, tapering off as the battery charges. None of this is mentioned in the "extra" good chineese instructions, lol ;) Anyone know more about how that's accomplished?